How to Delete an Assignment Submission on Blackboard
Create an assignment
Assignments are always available to instructors in the Ultra Course View.
You can create assignments alongside other content. Students can access their work next to the content they need, right when they need it. You can also create a group assignment and release it to one or more groups in your course.
More on creating assignments for groups of students
Feel free to experiment! Students can't see what you add until you make your assignments visible.
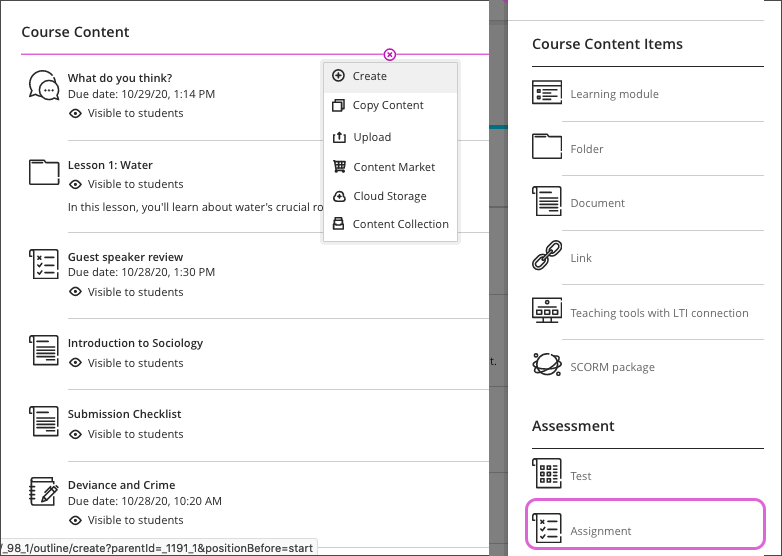
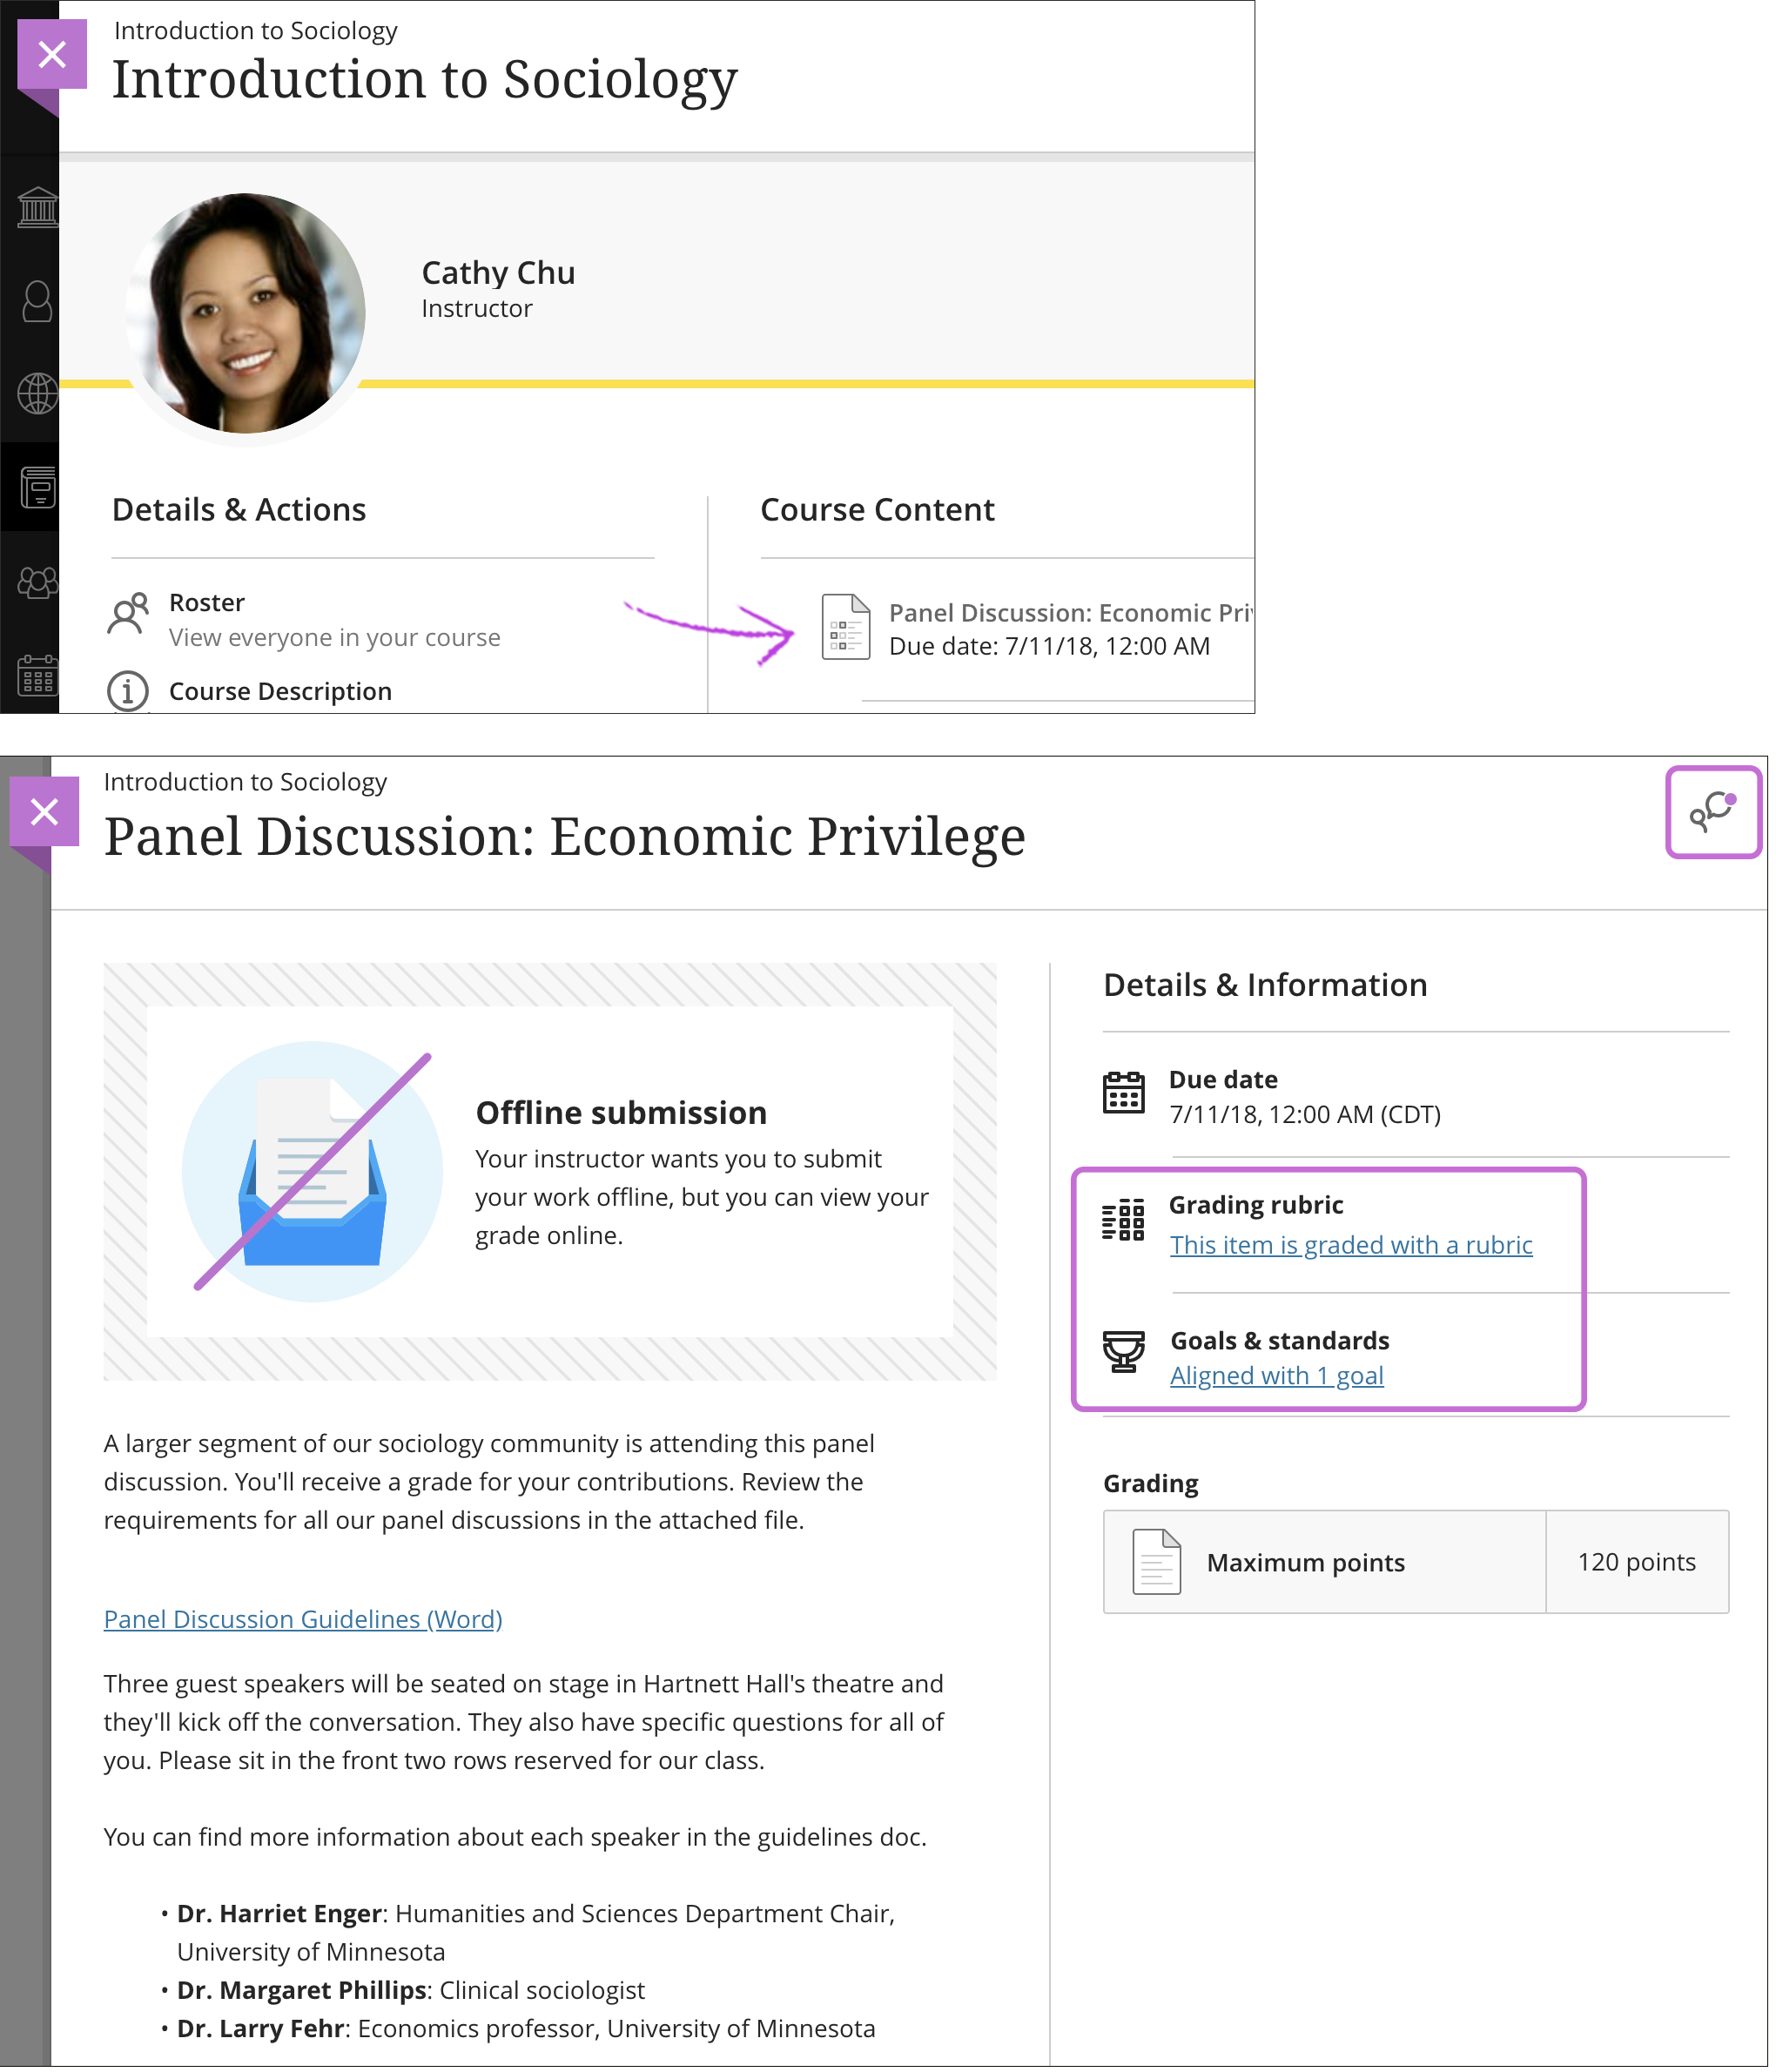
On the Course Content page, select the plus sign wherever you want to add an assignment. In the menu, select Create to open the Create Item panel and select Assignment. The New Assignment page opens.
You can also expand or create a folder and add an assignment.
When you create an assignment, a gradebook item is created automatically.
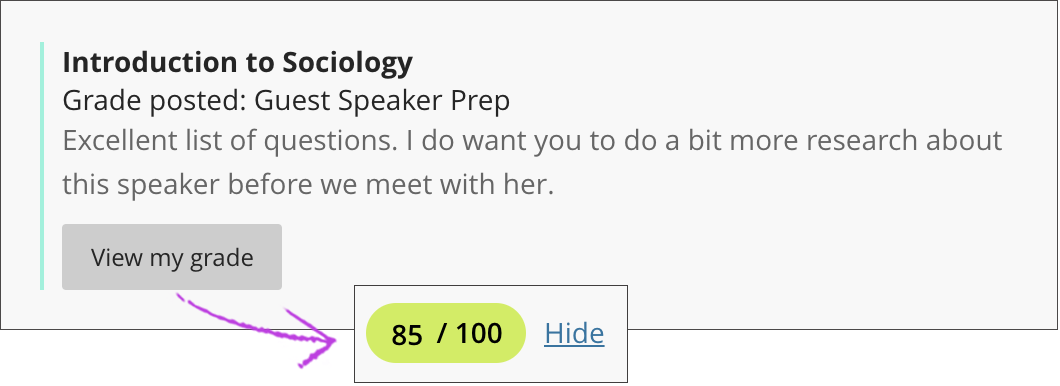
After you post assignment grades, students can view their scores on their grades pages or in the activity stream. They can also access an assignment, their submissions, your feedback, rubrics, and their grades from the assignment link on the Course Content page.
Video: Create an Assignment
Watch a video about creating assignments
The following narrated video provides a visual and auditory representation of some of the information included on this page. For a detailed description of what is portrayed in the video, open the video on YouTube, navigate to More actions, and select Open transcript.
Video: Create an assignment shows how to create an assignment with simplified workflows.
New Assignment page
Provide a descriptive title so students can easily find the assignment among your course content. On the Course Content page, the title appears as the link students select to view the materials. If you don't add a title, "New Assignment" and the date appear in the content list. If you don't add content, the assignment won't appear on the Course Content page.
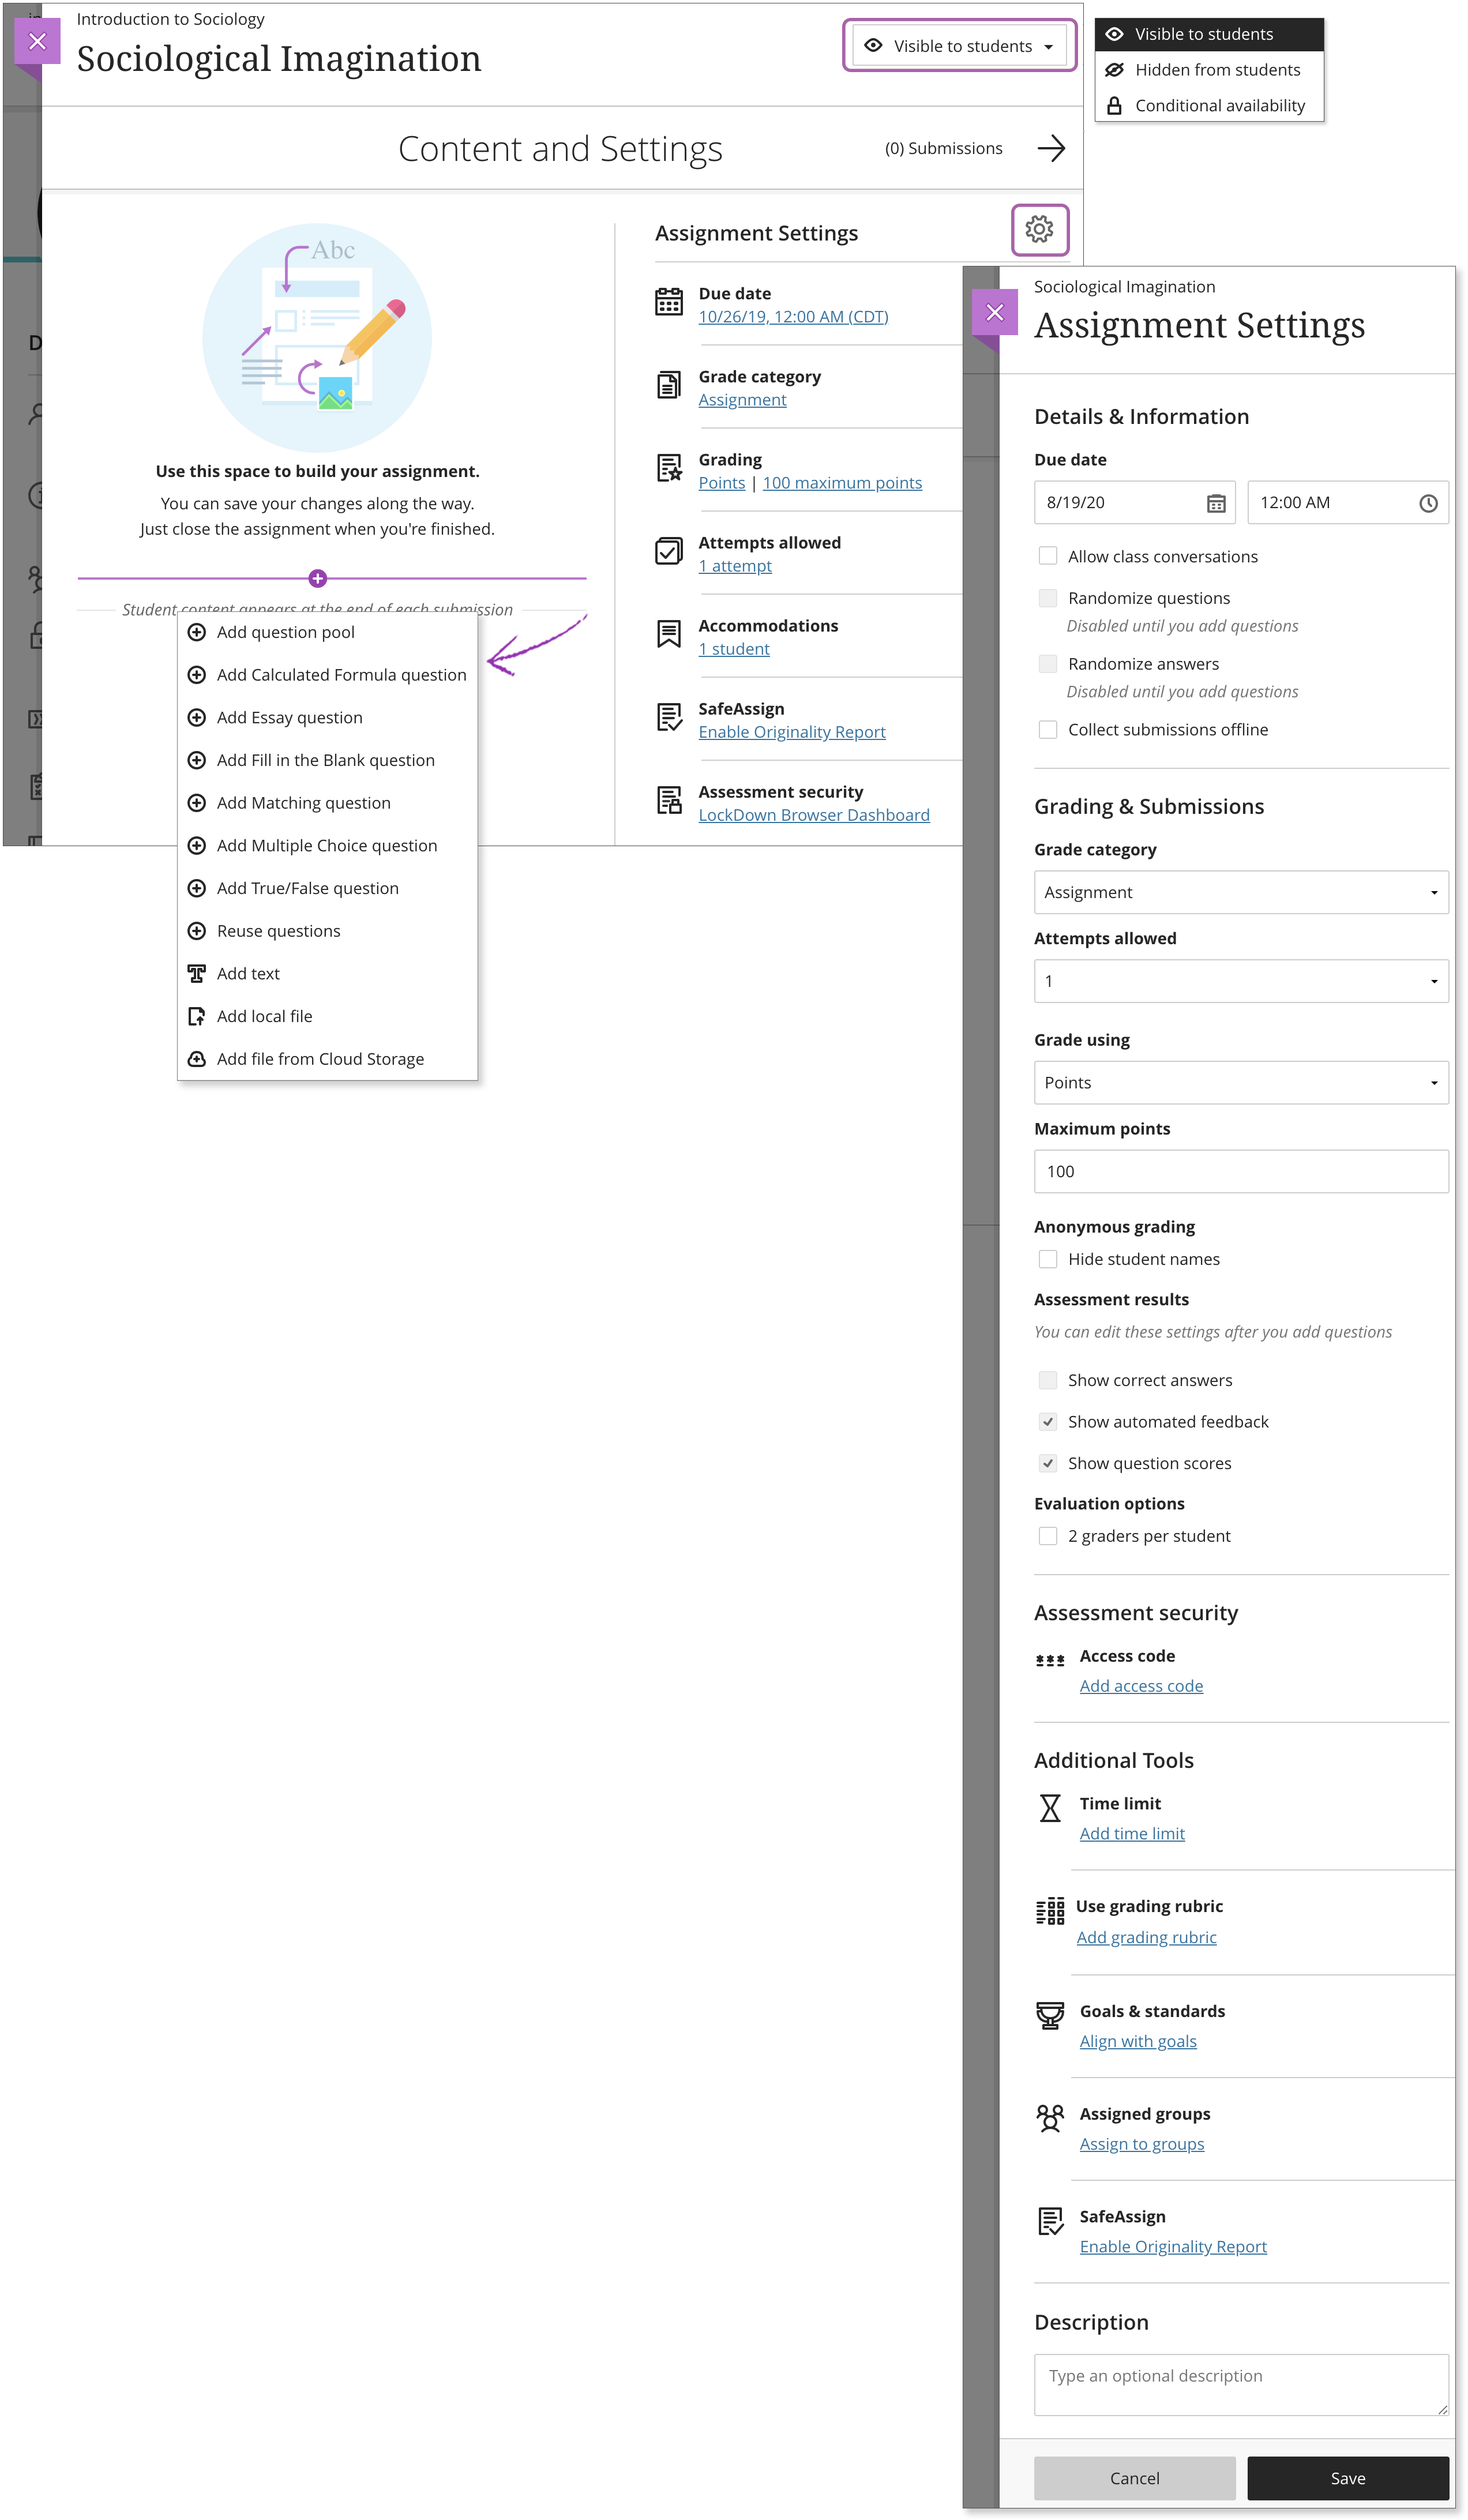
Add text, files, and questions. Select the plus sign to open the menu and make a selection. You can choose a question type, add a question pool, or reuse questions and content from existing assessments. You can add files and text, such as instructions for the assignment. You can also add files from cloud storage, such as OneDrive® and Google Drive™.
More on adding questions in the tests topic
More on adding question pools
More on reusing questions
Show or hide the assignment. Students can't see an assignment until you choose to show it. You can create all your content ahead of time and choose what you want students to see based on your schedule. You can also set availability conditions based on date, time, and performance on other items in the course gradebook. On the Course Content page, students can see when you set the assignment to show.
Apply assignment settings. Select the Settings icon to open the panel where you provide the assignment's details and information.
Provide a due date. Due dates appear on the calendar and in the activity stream. Late submissions appear with a Late label in the course gradebook. Encourage students to review what's due now and what's ahead so they can ask questions as soon as possible.
View accommodations. You can set accommodations for students and make them exempt from certain course requirements, such as assignment due dates and time limits. To select accommodations, go to the Roster and open a student's menu. The number of accommodations you've made appears on the assignment page in the Assignment Settings section.
More on accommodations
Allow class conversations. What if your students have questions about an assignment? You can allow conversations within an assignment, and anyone can contribute. As the conversation develops, it appears only with the relevant assignment.
More on conversations
Collect submissions offline. You may want to grade student work that doesn't require students to upload a submission. For example, you can add grades to your gradebook for oral presentations, science fair projects, acting performances, and artwork delivered in person.
More on collecting submissions offline
Randomize questions and answers. You can randomize questions and their answers to support practice/drilling activities and help students avoid academic dishonesty. You can use one or both settings so assignments appear differently for each student.
Questions appear in order to you but are randomized for students. To prevent confusion, don't add numbers to reference other questions within the assignment.
You can only randomize answers for Matching and Multiple Choice questions. If you want to randomize answers for True/False questions, use the Multiple Choice question type with True and False answer choices. You can't randomize questions in an assignment with text blocks or attachments.
More on randomizing questions and answers
Change the grade category. You can change the assignment's grade category to be part of one of the custom gradebook categories you set up in your course. You can create new categories to customize how coursework is grouped in your course. Custom categories can be useful when you set up the overall grade.
Determine the number of attempts. You can let your students submit more than one attempt at an assignment. When you allow multiple attempts, you can also choose how the final grade is calculated.
Select the grading schema. From the Grade using menu, select an existing grading schema such as Points. You can change the grading schema at any time and the change will show to students and in your gradebook.
Enable anonymous grading. When you create an assignment without questions, you can enable anonymous grading so student names are hidden while you grade. You may only add text and files to anonymously graded assignments.
More on anonymous grading
Show assessment results. Select the Show correct answers check box to allow students to see the correct answers to automatically scored questions after they submit. If you don't add questions to your assignment, select the check box for Show correct answers during creation.
More on showing correct answers
Enable automated feedback. Provide feedback to students that's released automatically based on your settings.
More on automated feedback
Add an access code. You can issue an access code to control when students submit an assignment. At this time, access codes are generated randomly by the system. You can't customize the access codes. You can also add an access code to a group assignment.
More on access codes
Enable parallel grading. You can enable parallel grading and assign graders when you create an assignment. You can also enable parallel grading even after students make submissions. The system randomly assigns graders you choose so each student has two graders for the assignment. The grading workload is distributed evenly among the graders. Graders can only open the submissions for the students assigned to them. Instructors or reconcilers determine the final grades for students.
More on parallel grading
Add a time limit. A time limit can keep students on track and focused on the assignment because each person has a limited amount of time to submit. The assignment attempts are saved and submitted automatically when time is up. You can also allow students to work past the time limit. At this time, you can't add a time limit to group assignments.
Add a grading rubric. Rubrics can help you evaluate student submissions based on key criteria that you define. You can create a new rubric or associate an existing rubric. A rubric is a scoring tool that you can use to evaluate graded work. At this time, you can only add a rubric to as assignment without questions.
Add goals and standards. You can align an assignment to one or multiple goals. You and your institution can use goals to measure student achievement across programs and curriculums. You can also align individual questions to goals.
Make a group assignment. You can create an assignment for one or more groups of students. By default, you assign a grade to each group as a whole, but you can change a group member's individual grade.
Enable SafeAssign. You can use SafeAssign to check for potential plagiarism in student submissions. You can enable the SafeAssign Originality Report any time, even after students have started their submissions, but submissions are only checked when SafeAssign is enabled.
Add an optional description. The description appears with the assignment title on the Course Content page.
Add files and text blocks to assignments
Select the plus sign to open the menu wherever you want to add questions, text, or a file. You can add as many text blocks and files as you want.
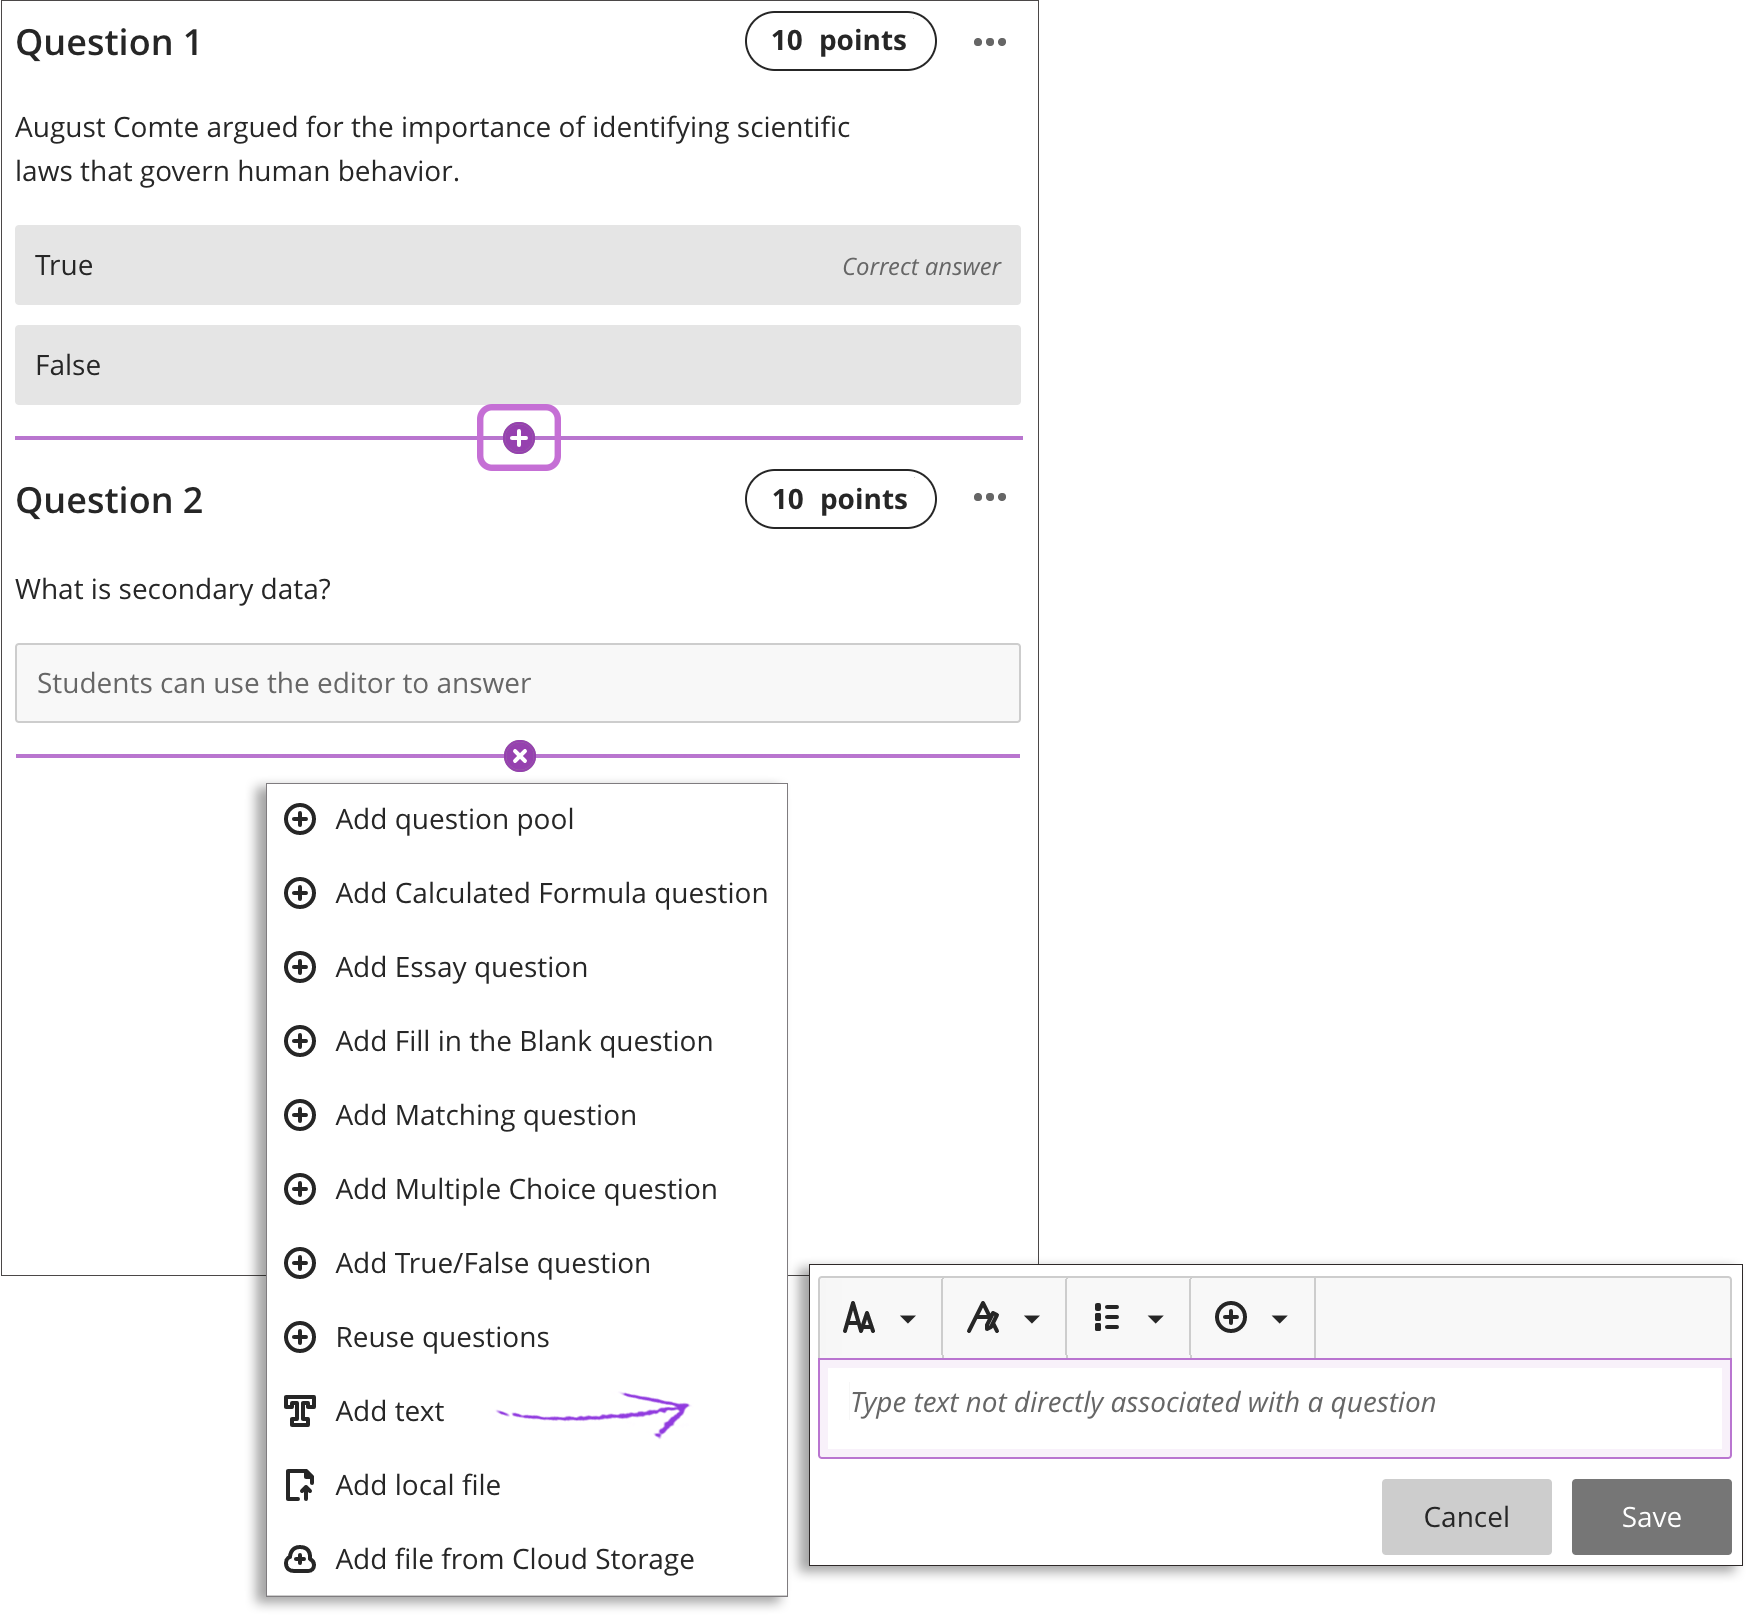
Add text blocks. Select Add text to open the editor. You can include instructions for a section of the assignment or introductory text for an audio file or image. You can also paste text from a Word doc.
You can also use the editor to embed images and attach files along with your text.
If you create an assignment that includes only text blocks, you can manually change the Maximum score in the Assignment Settings.
Add files. Select Add local file to browse for a file on your computer. Your institution controls the maximum file size you can upload. You can't add a folder of files.
Add file from Cloud Storage: You can instantly connect to multiple web apps where you store files, such as OneDrive. The files you add are copies. If you make a change to a file in cloud storage, you need to upload a new copy in your course. If your browser allows, media files you add from cloud storage display inline.
More on cloud storage
Media file viewing options
Media file viewing options
If your browser allows, media files you add to assessments display inline by default. If your browser can't display a media file inline, it appears as an attachment. Files you add from cloud storage behave in the same way.
Images that display inline are embedded in a 768-pixel block at the biggest breakpoints. The closer to that size the images are, the less padding appears around them.
Access a media file's menu and select Edit.

To edit the file's alternative text or display behavior, select the file in the editor and then select the Edit Attachment icon.

In the Edit File Attributes window, you can choose how your video, audio, or image file appears in the assessment: inline or as an attachment. For example, you can display extremely large files as attachments that students can download. You can edit the file names for files displayed as attachments.
You can also add alternative text to describe images you add. Alternative text describes the image for people who use screen readers or visit web pages with images turned off.
For video and audio files that appear inline, students have controls for play, pause, and volume control. For video files, students can view the video in full screen.
View media files as attachments
For media files that appear as attachments, students access the menu and select Preview File or Download Original File. Instructors have the additional options of move, edit, and delete.
More on editing files within questions
Add a timer
You can add a time limit to an assignment in the Ultra Course View. A time limit can keep students on track and focused on the assignment because each person has a limited amount of time to submit. The assignment attempts are saved and submitted automatically when time is up.
You can also allow students to work past the time limit. Additional time allows students to reconnect if they lose connectivity during their attempts. You can allow extra time to see if the original time you set is enough for students to complete the assignment. When you grade assignments, you can see how much extra time each student used to complete the assignment. If you included questions, you can also see which questions were answered after the initial time limit. Students also see this same information when they access their graded assignments.
At this time, you can't add a time limit to group assignments.
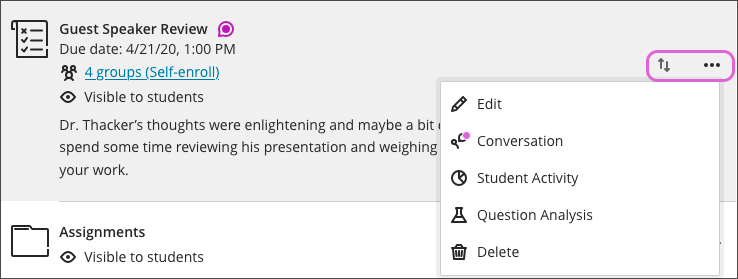
Edit, reorder, and delete assignments
You can make changes to existing assignments and change where they appear on your Course Content page. Be aware that if you change an existing assignment that students can access, some students may have started their submissions. You can't change the grading schema if you've already started grading.
Press the Move icon in an assignment's row and move it to a new location. You can also move an assignment into a folder.
In an assignment's row, open the menu to select the Edit and Delete functions.
You can use your keyboard to move an assignment.
- Tab to an item's Move icon.
- Press Enter to activate move mode.
- Use the arrow keys to choose a location.
- Press Enter to drop the item in the new location.
Delete assignments
You can delete an assignment from your course and if no student submissions exist, the gradebook item is also deleted. For assignments with submissions, you must confirm that you want to permanently remove the assignment, all submissions, and grades from your course.
Or, hide the assignment from students to preserve the submissions and the scores in the gradebook. Students can't access hidden assignments on the Course Content page or on their grades pages even if you have graded submissions.
Assignments and the activity stream
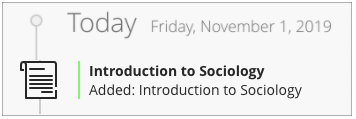
When you create an assignment and make it visible to students, they're notified in their activity streams.
After you post assignment grades, students can select View your grade to display their grades. Any feedback you provide appears after the assignment title.
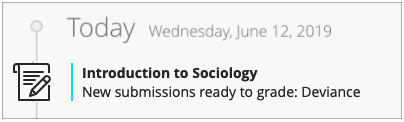
You'll see an alert in the stream when you have submissions to grade. Select the assignment title to begin grading on the assignment submissions page.
More on the activity stream
Collect submissions offline
You can create assessments that appear on the Course Content page that don't require students to upload submissions. You can add instructions, files, a rubric, and goals so students can prepare for the offline work. You can also enable conversations, but you can't add questions or grade anonymously.
Examples of offline work:
- Oral presentations
- Science fair projects
- Acting performances
- Artwork delivered in person
- Face-to-face team building exercises, panel discussions, and debates
Instructors who teach hybrid courses may find this type of assessment most useful. For example, you can use a rubric to grade an in-class presentation as a student presents. No need to take notes or add a score later.
When you create an assessment, you can choose to collect submissions offline in the settings panel. When students open this type of assessment, they're informed they can't submit work online. If you create groups to collect submissions offline, students can view their group members.
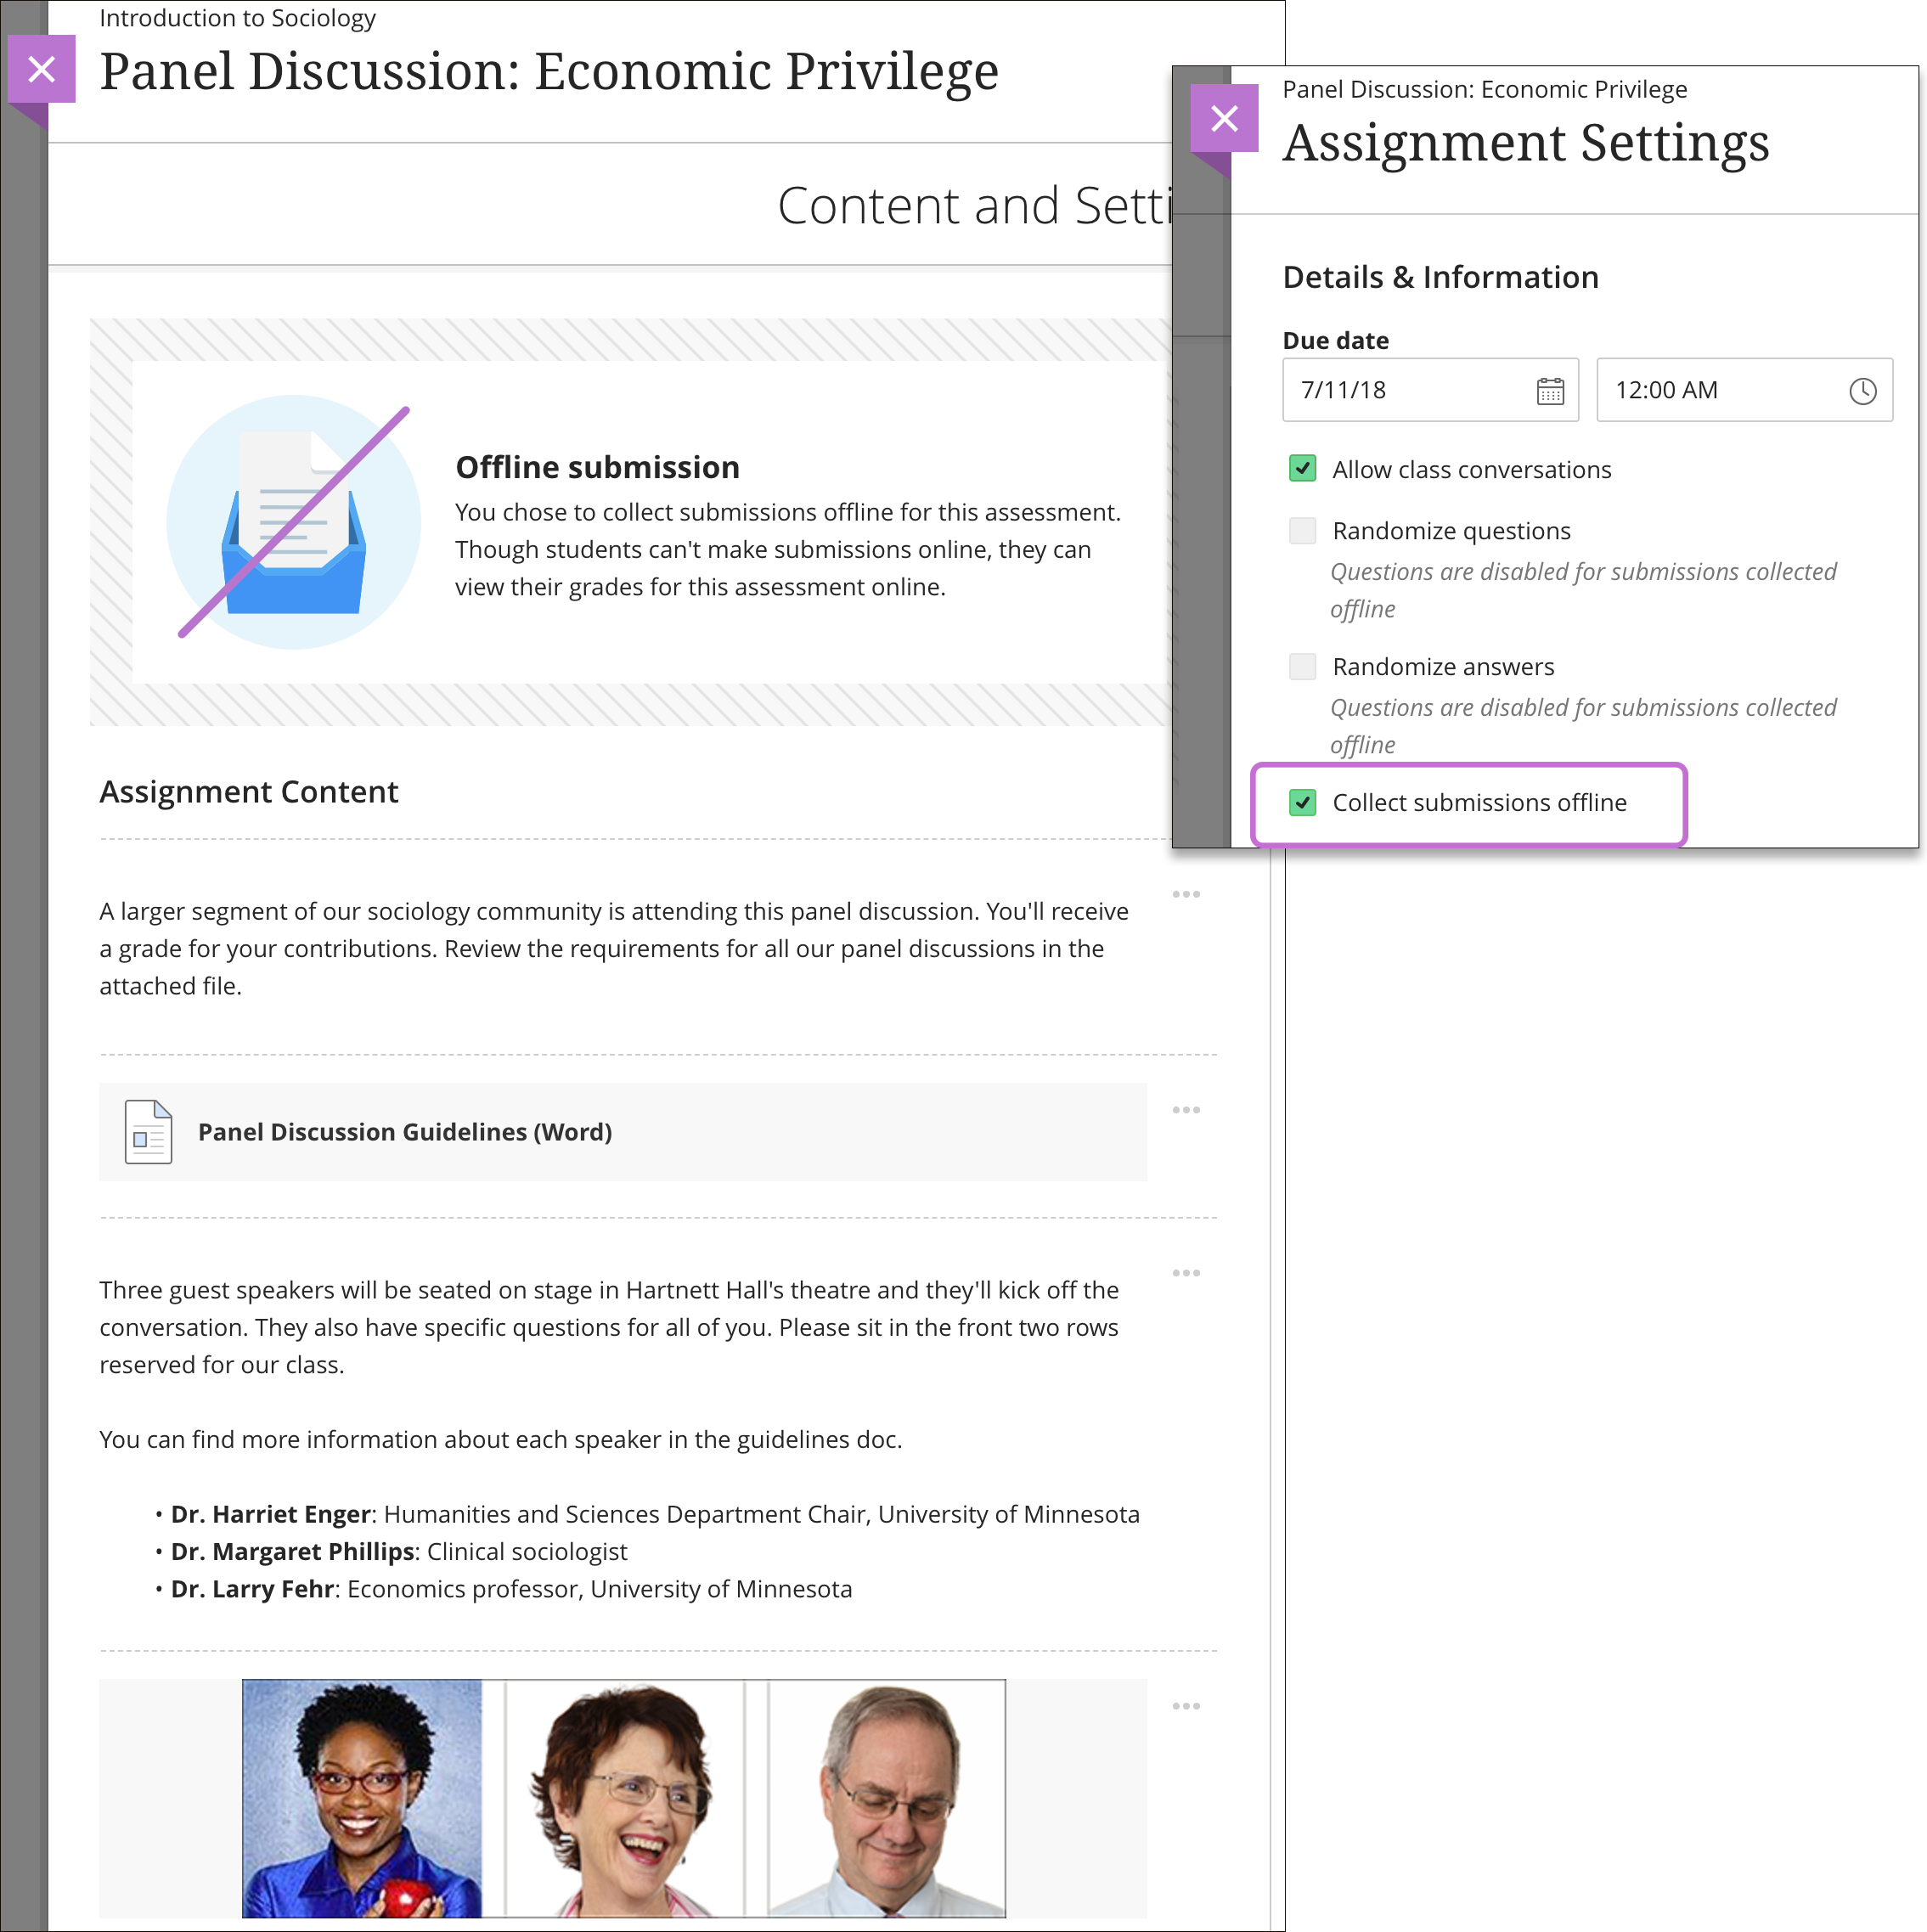
For submissions collected offline, you can't allow multiple attempts, allow a time limit, or use SafeAssign.
For grades that require students to be present outside of class, such as for a guest speaker or a field trip, you can add meetings to the attendance feature.
More on adding a meeting
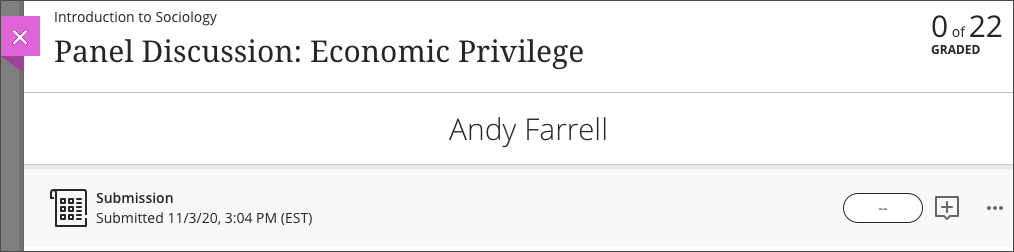
Grade offline submissions
When you're ready to grade offline submissions, open the submissions list page from the assessment page or the gradebook. Select a student's name to open the Create Attempt panel, provide the submission date and time, and save.
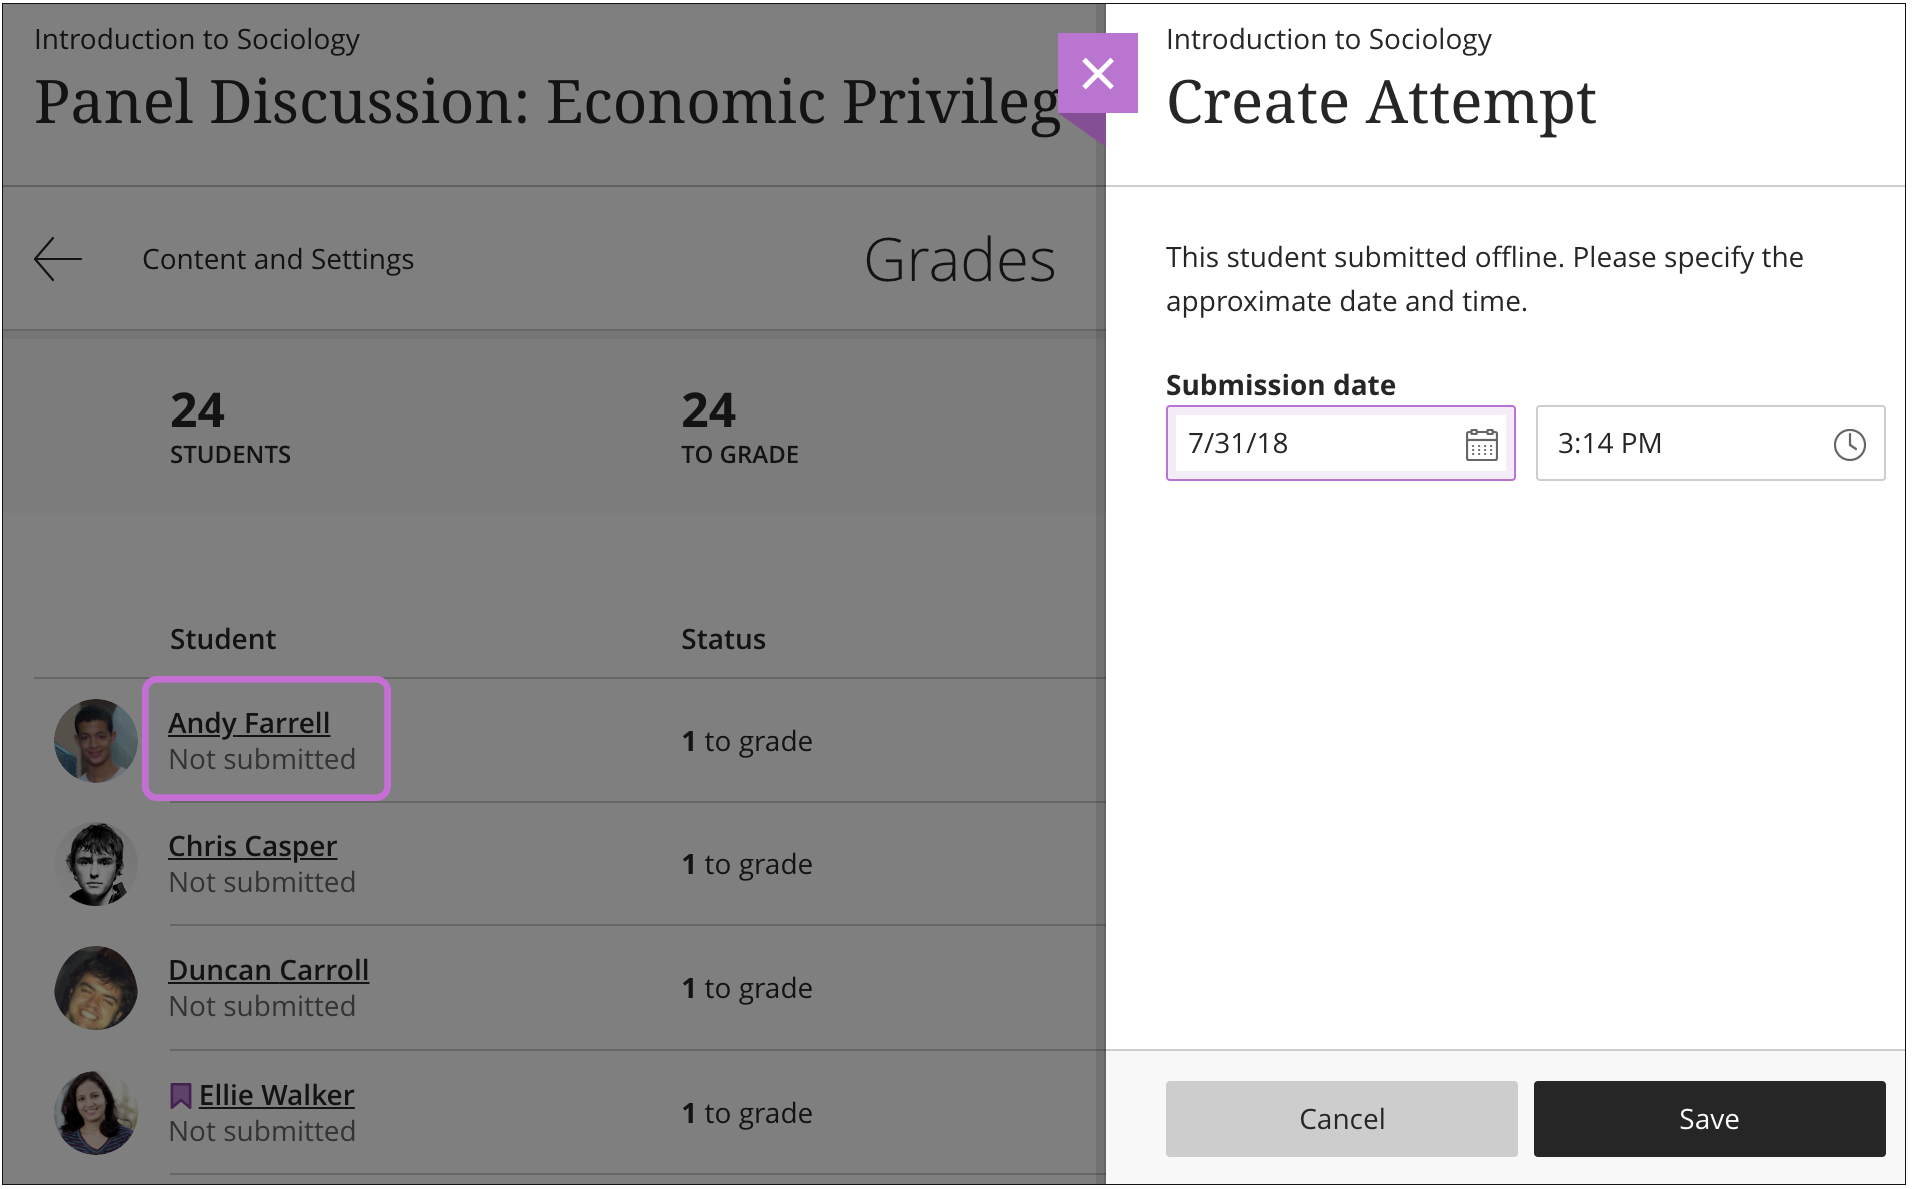
On the student's submission page, you can assign a grade and use a rubric if you associated one.
What do students see?
Students can view the assessment alongside other content on the Course Content page and on their global and course grades pages. Students are informed they can't submit work online. They can access other information, such as the instructions and a rubric if you added one. Students can participate in the assessment's conversations if enabled.
More on the student workflow
How to Delete an Assignment Submission on Blackboard
Source: https://help.blackboard.com/Learn/Instructor/Ultra/Assignments/Create_and_Edit_Assignments
0 Response to "How to Delete an Assignment Submission on Blackboard"
Post a Comment